Sue has a large collection of 35mm and (I think) medium format slides and we’d been looking around for a way of getting some prints from them without giving them to someone else and hoping they’ll take care of them. We discovered in the end that we had all the equipment we needed just lying around in the house!
Of course the first thing we tried was scanning them using the trusty HP OfficeJet all-in-one, but the results were really quite disappointing. We’d tried the same thing with negatives before, with equally disappointing results. The colours were really bad (far too dark), and the resolution was appallingly low.
Next we tried looking at purpose-built slide scanners. These things are quite pricey, and I actually couldn’t find one that was affordable and had Linux support. I had heard you could get slide holders for scanning slides on a conventional scanner, but couldn’t find out much about where to get them from. I did find a page describing how to make one yourself, so we tried that — it was rubbish. It was fun to make, but gave no better results than just scanning the slides as they were.
It was at this point we discovered that the HP scanner hits some sort of resolution limit at about 400dpi, beyond which the results get markedly worse. When the slide is only an inch and a half wide, 400 dots per inch is quite a lot lower than we were hoping for. The advertised resolution of the scanner is 1200dpi, but never mind.
Somewhere I’d read that another approach would be to take digital pictures of the slides on a lightbox. So, slightly resigned to the whole effort being a failure, and about to give up, I suggested to Sue that she should have a quick go at that. Bingo!
 Using a macro lens, a tripod, a lightbox, a chair and a pillow, Sue managed to get much better results than I had with the scanner. To get the slide as close to the lens as it would focus, she inclined the lightbox to about 30 degrees on top of a chair, holding it there with a pillow. The slide was kept in place with some sellotaped bits of paper! Once it was lined up correctly the photo was taken using the infra-red remote shutter release trigger.
 The slides were not quite full frame in the camera, but not very far from it. The lightbox provided a nice evenly-lit background, and the tripod and remote trigger avoided any shaking while taking the picture. Each slide had to be perfectly square on to the lens to make sure it was all in focus.
 Once the pictures were all taken it was just a matter of cropping them on the computer. To get prints from these digitized images, we’ll probably take the easy route and send them to PhotoBox. 🙂
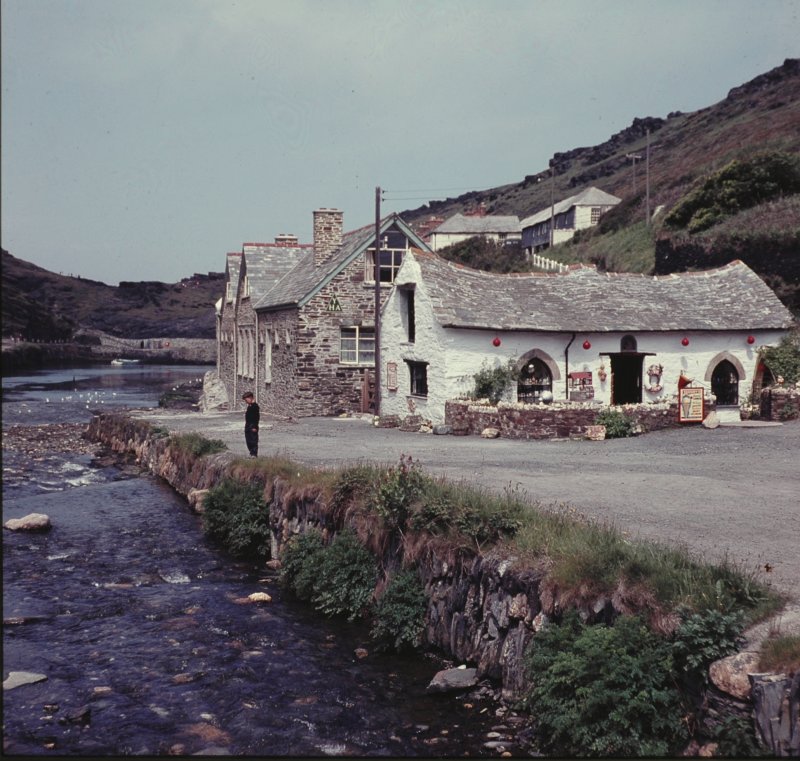
Here is a reduced-size version of the finished result, a picture of the Pixie House (Harbour Lights) in Boscastle, taken sometime in the 1960s:
UPDATE: This building was washed away during flooding in recent years. Since then, we visited Boscastle and took some pictures. Here is a picture of the rebuild:


Comments
124 responses to “Digitizing 35mm slides without a slide scanner”
We’ve since got one of these: http://www.firebox.com/product/2614/Photo-and-Negative-Scanners (the SD version) which works very well without needing any computer at all.
I caught your website as my mum is looking for a similar solution for boxes of 35 mm slides that my grandad had.
I just had to reply to you when I saw the Pixie House at Boscastle in Cornwall.
The Pixie House was washed away when the flood hit Boscastle a few years ago and this would be a very important picture to the local history I am sure.
I haven’t been back to Boscastle since the flood so I’m not sure what is in its place.
Sharon: thanks, yes I knew about the flood, and we’ve been to Boscastle since then. I’ve updated the article to show a picture of what’s there now.
[…] year ago someone was selling one for $2500! This approach might help: http://cyberelk.net/tim/2007/03/04/d…slide-scanner/ duckduckgo is my […]