
Sue has a large collection of 35mm and (I think) medium format slides and we’d been looking around for a way of getting some prints from them without giving them to someone else and hoping they’ll take care of them. We discovered in the end that we had all the equipment we needed just lying around in the house!
Of course the first thing we tried was scanning them using the trusty HP OfficeJet all-in-one, but the results were really quite disappointing. We’d tried the same thing with negatives before, with equally disappointing results. The colours were really bad (far too dark), and the resolution was appallingly low.
Next we tried looking at purpose-built slide scanners. These things are quite pricey, and I actually couldn’t find one that was affordable and had Linux support. I had heard you could get slide holders for scanning slides on a conventional scanner, but couldn’t find out much about where to get them from. I did find a page describing how to make one yourself, so we tried that — it was rubbish. It was fun to make, but gave no better results than just scanning the slides as they were.
It was at this point we discovered that the HP scanner hits some sort of resolution limit at about 400dpi, beyond which the results get markedly worse. When the slide is only an inch and a half wide, 400 dots per inch is quite a lot lower than we were hoping for. The advertised resolution of the scanner is 1200dpi, but never mind.
Somewhere I’d read that another approach would be to take digital pictures of the slides on a lightbox. So, slightly resigned to the whole effort being a failure, and about to give up, I suggested to Sue that she should have a quick go at that. Bingo!
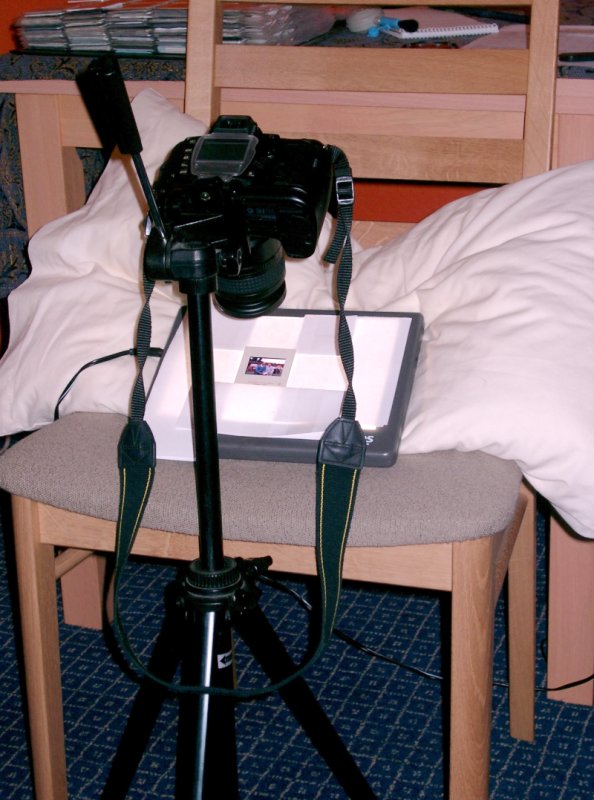 Using a macro lens, a tripod, a lightbox, a chair and a pillow, Sue managed to get much better results than I had with the scanner. To get the slide as close to the lens as it would focus, she inclined the lightbox to about 30 degrees on top of a chair, holding it there with a pillow. The slide was kept in place with some sellotaped bits of paper! Once it was lined up correctly the photo was taken using the infra-red remote shutter release trigger.
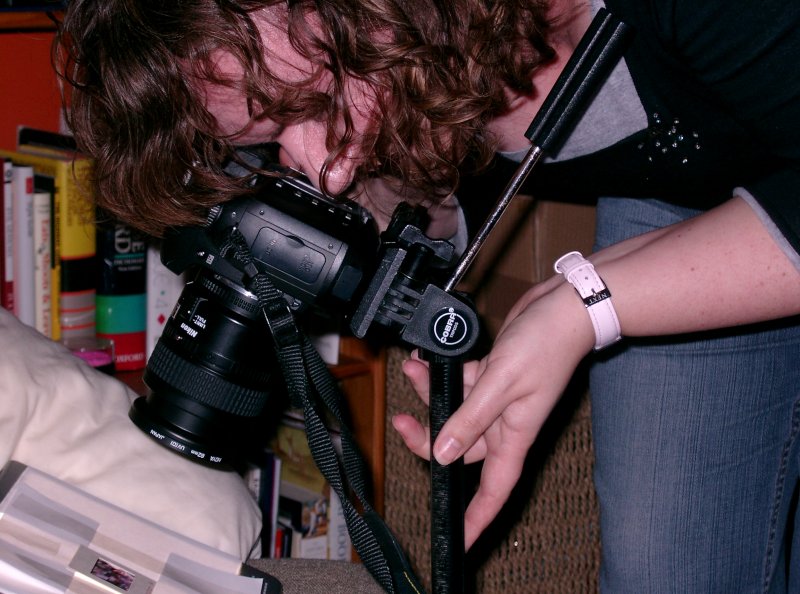 The slides were not quite full frame in the camera, but not very far from it. The lightbox provided a nice evenly-lit background, and the tripod and remote trigger avoided any shaking while taking the picture. Each slide had to be perfectly square on to the lens to make sure it was all in focus.
 Once the pictures were all taken it was just a matter of cropping them on the computer. To get prints from these digitized images, we’ll probably take the easy route and send them to PhotoBox. 🙂
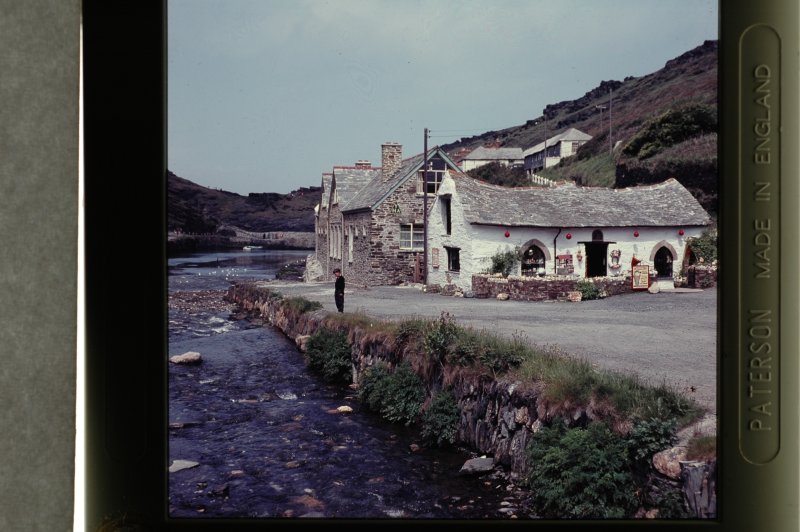
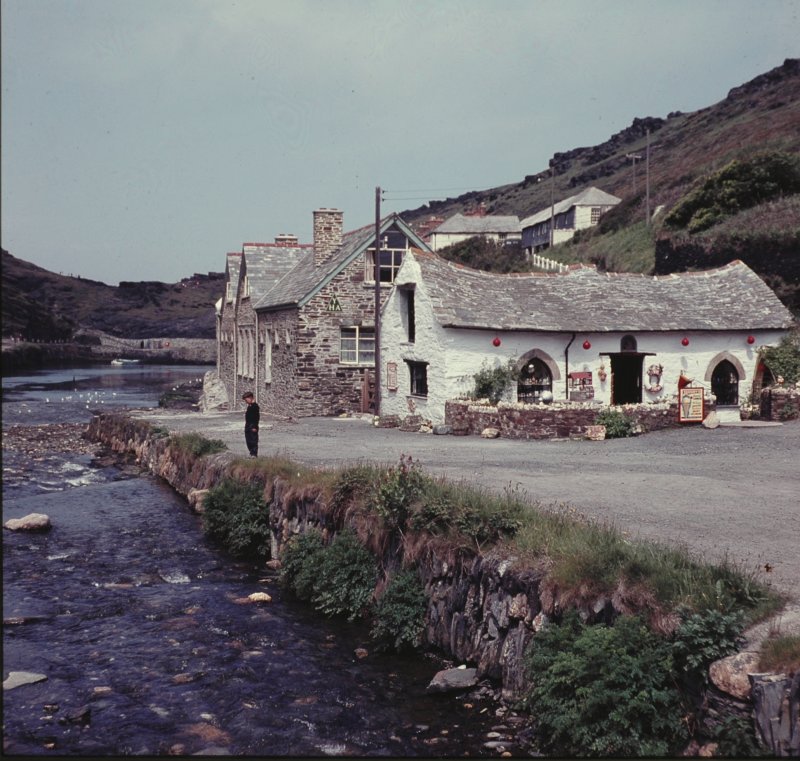
Here is a reduced-size version of the finished result, a picture of the Pixie House (Harbour Lights) in Boscastle, taken sometime in the 1960s:
UPDATE: This building was washed away during flooding in recent years. Since then, we visited Boscastle and took some pictures. Here is a picture of the rebuild:

Comments
124 responses to “Digitizing 35mm slides without a slide scanner”
Re slide problems Projecting slides thru a slide projector
always gives you a “tunnel effect” the centre area is always brighter
than the periphery Try replacing the bulb with a practical LED device
Hello Steve Wright
Could you please send me details of your slide copying rig and instructions on how to make it? My email address is dotandtonyk@btinternet.com
Thanks very much
Tony Keates
[…] has been quite a response to a comment made by Clive Wright on a previous post about digitizing 35mm slides. Here’s what Clive said: Having recently […]
This post contains some more details about Clive’s method.
Tim: You gave me a good idea which I will share here. I have an old Bell & Howell slide cube projector (see site http://www.old-photo.com/pages/bell-and-howell-slide-cube-projector.htm) and on the front of it, it has a slide “Preview / Edit” screen where the slide passes over just prior to entering the lens for projection. The “Preview / Edit” screen is back-lit. So taking your idea, I just held my Canon A530 over it with the macro setting and snapped the pictures. They came out pretty good. I feel I could really improve them by setting up my tripod, as you did, to steady the shots. The beauty of this setup is that to digitize the next slide, I just press the button and advance the projector. The next slide moves right into the “Preview / Edit” window. I will let you know my results.
Thank you,
Don
well thats all very interesting i have a film scanner that will scan up to approx 36 medium format transperincies depending on dpi eg 300dpi approx time per scan at 16bit col 25-35sec this is true col depth and mot scans at same size can be enlarged to A3 with no image break-up at all eg 6x9cm enlarged to 30x40in scaned at 600dpi no problem but this is a comercial grade scanner for prepress and graphic arts reproduction
Hello Tim
I’m fascinated by the ingenuity and resourcefulness of the participants of this site. Like all, I have thousnads of slides to preserve, but not thousands of hours to copy them. Can I add my name to the list to get a opy of Clive Wright’s Rig for slide duplication. Thanks for taking the time to spread this information. This is so helpful.
Thanks in advance for Clive’s contact info.
Best
Alan Snelson
Alan: see the comment from November 14th. You can see the full post detailing Clive’s method here:
http://cyberelk.net/tim/2008/11/14/clive-wrights-35mm-slide-rig/
Tim, this is a great idea that works quite well. My wife has been going thru 1,000’s of slides – picking out the best ones to eventually scan. (I found your site while looking for slide scanners.)
Took photos of three slides on a slide lightbox with a Panasonic DMC-FZ20 digital on macro, loaded them into the laptop and cropped them – voila! Fast & easy to just slide them past the camera and the results are just fine for viewing on the computer monitor (which is where we view most of our photos these days!
Thanks again!
Taking the slide with the digital camera to transfer them to the computer is my aim. I don’t have a slide scanner at present but am considering a purchase. The idea of taking the slide looks very tempting. How do you make a Light Box or do you have to purchase this piece of equipment???
Easy enough to buy one. See my earlier comment about that.
I basically copied this idea – but added an improvised method to get even light behind the image – instead of a lamp under my lightbox, I lay my monitor flat (showing a plain white desktop background), but the lightbox window on top of that, and slowly adjusted the brightness down until I got good results.
Would never have thought of this without your great blog post – thanks.
Hello,
What do you think of this thing:
VuPoint 35mm Negative Film Slide Digital Converter
http://www.amazon.com/VuPoint-FS-C1-VP-Silde-Digital-Converter/dp/B000V7CPJG
Thanks for the shoot the slides idea,
steve
Does not doing it this way take a lot of time. If oine has thousands ofslides, it could take tears.
You can’t imagine how I’m hapy to see I gona save my 4.000 old slides from 1967 til now, using this simple sistem… Tanks and sorry my english… I’m from Brazil.
Doesnt this take a long time for each slide? If you have a few thousand to deal with, you wnat something really snappy. Any suggestions? Joe
It has been a while since this post and technology has hopefully evolved enough to produce slide scanners of much better quality. There are, however, some requirements that need to be taken care of in favor of having a good quality scan of a slide or film.
Some tips may be found here:
http://slidescannertips.com/flatbed-slide-scanner/
Michael
To cut down on the time it takes to scan your negatives make sure the scanner you buy is capable of batch processing. This could cut down your processing time by a factor of 5 or 6. The prices for scanners continue to come down and the tech just keeps getting better.
Great info here though if you fon’t want to go the buy route.
I just made my own 35mm automatic slide scanner based on a Nikon camera and Kodak projector which are tied together with a control box I have designed for the purpose. It runs perfectly and scans my slides fast and easy – so the method is highly recommendable. You can see a description with pictures and an equipment list here http://www.avidia.dk/hardware.html
[…] following sites are great references for more of the same information: Print Head, Simple Slide Copy Jig, Macro Lens & Tripod. This entry was posted in Digital Cameras, Film […]
Hi Tim, I was looking at getting a film scanner a few years ago but poor Linux support put me off. I did find VueScan, http://www.hamrick.com/ a commercial but inexpensive scanning program that started out specialising in film scanners and is available for Linux. The author signs NDAs, etc., with manufacturers to get the specs required, IIRC.